How to Use QR Code Menus to Showcase Allergen and Dietary Information
Updated:
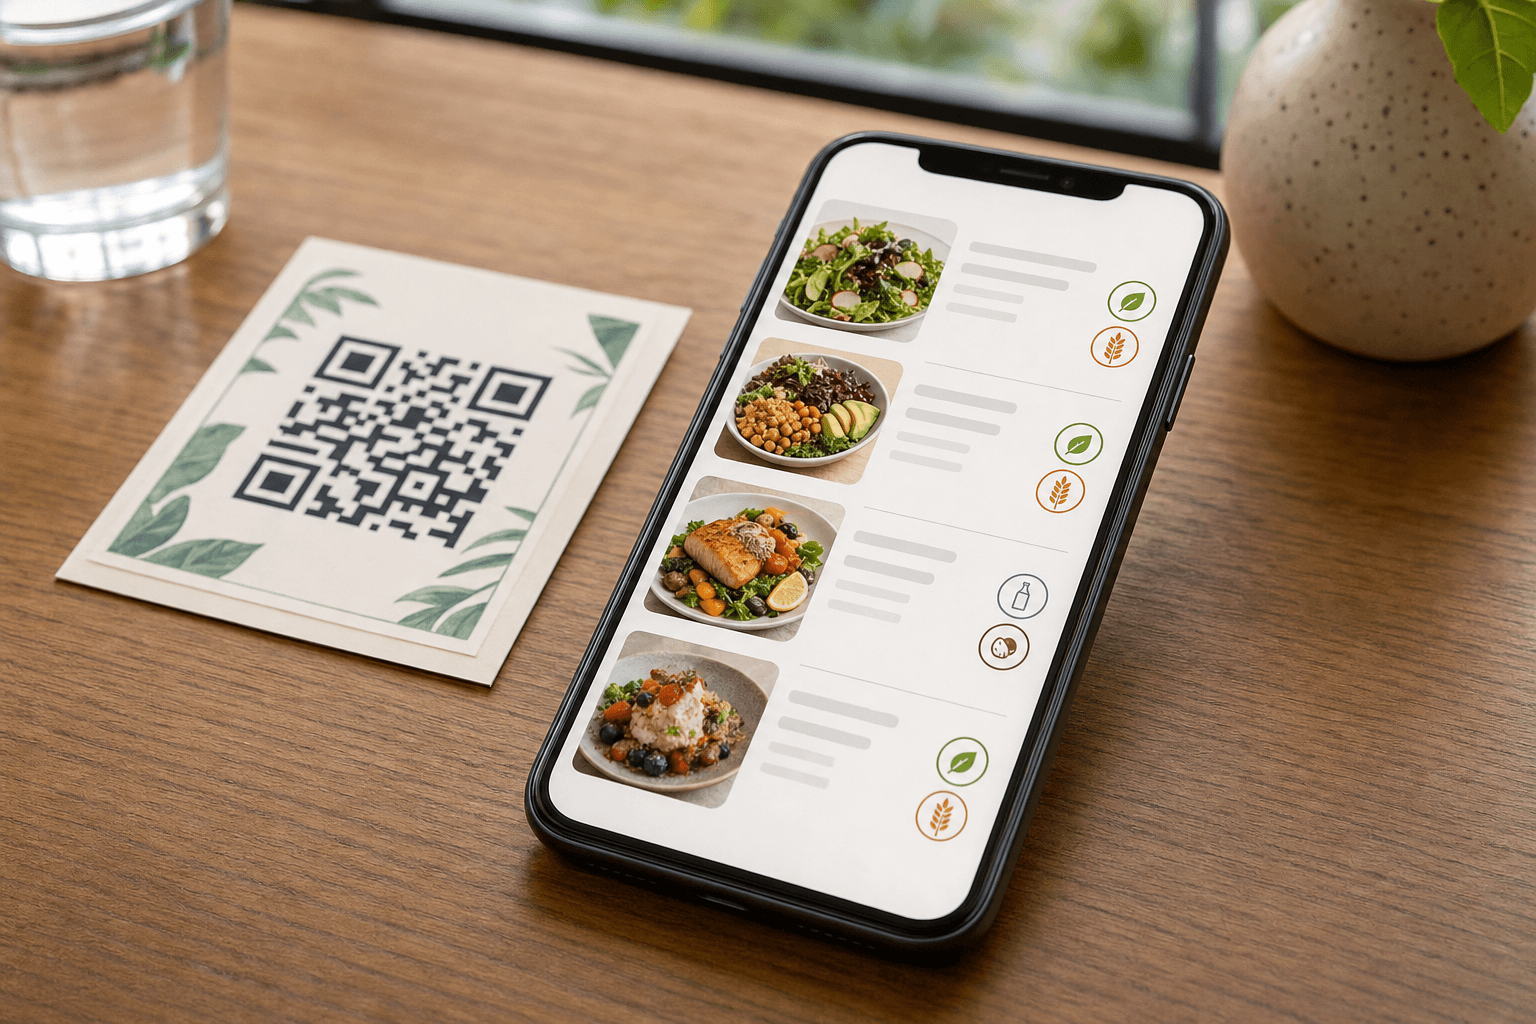
Food allergies are not a niche concern. According to Food Allergy Research & Education (FARE), roughly 33 million Americans live with a diagnosed food allergy, and reactions to undisclosed allergens send thousands of people to the emergency room every year. For restaurant owners, that translates into real legal exposure, real reputational risk, and — most importantly — real harm to guests.
The good news is that a well-built QR code menu is one of the most practical tools you have for communicating allergen and dietary information clearly, consistently, and at scale. Unlike a printed menu that goes out of date the moment you change a recipe, a digital menu lets you update a single source of truth instantly — so every guest who scans your code sees accurate information right now, not six months ago.
This guide walks you through exactly how to do that: what information to include, how to structure it, how to present it visually, and what operational habits to build around it.
Why Allergen Information Belongs on Your QR Menu
Before getting into the how, it's worth being clear on the why — because the stakes go beyond compliance checkboxes.
- Guest safety: A guest with a peanut allergy needs accurate information before they order, not after the plate arrives. A QR menu that surfaces allergens upfront removes a dangerous gap in communication.
- Server workload: When dietary information is visible on the menu, servers field fewer "does this contain gluten?" questions mid-service. That speeds up table turns and reduces the chance of a verbal miscommunication.
- Legal protection: In the United States, the FDA requires disclosure of the "Big 9" allergens (milk, eggs, fish, shellfish, tree nuts, peanuts, wheat, soybeans, and sesame) on packaged foods. For restaurants, regulations vary by state and municipality, but having documented, publicly visible allergen information is a defensible practice regardless of local law.
- Competitive advantage: Guests with dietary restrictions actively seek out restaurants that make their lives easier. Showing that information clearly — without requiring a guest to interrogate a server — is a genuine differentiator.
What Information to Include
The Big 9 Allergens
Start with the FDA's Big 9. These are the allergens responsible for the vast majority of serious reactions in the United States:
- Milk
- Eggs
- Fish
- Shellfish
- Tree nuts
- Peanuts
- Wheat
- Soybeans
- Sesame
Tag every menu item that contains one or more of these. If a dish may contain traces due to shared equipment or prep surfaces, note that too — "may contain peanuts" is a legitimate and important disclosure.
Dietary Preference Labels
Beyond clinical allergens, many guests filter by dietary preference. Common labels worth including:
- Vegan (V+): No animal products whatsoever.
- Vegetarian (V): No meat or fish, but may include dairy and eggs.
- Gluten-Free (GF): Contains no gluten-containing ingredients. Note if prepared in a shared kitchen where cross-contact is possible.
- Dairy-Free (DF): No milk or milk-derived ingredients.
- Nut-Free: No tree nuts or peanuts, and ideally no cross-contact risk.
- Halal / Kosher: If certified, say so clearly and include the certifying body.
- Low-Calorie / Low-Carb: Optional, but useful for guests managing specific health goals.
Modification Notes
Some items can be made allergen-friendly with a substitution — swapping dairy milk for oat milk, omitting croutons for a gluten-free salad, etc. Flagging these possibilities on the menu reduces the burden on both the guest and the server.
How to Structure Allergen Information on a Digital Menu
There are three main approaches, and the best choice depends on the complexity of your menu and your guests' needs.
1. Inline Icons on Each Item
This is the most common and most effective method. Assign a small icon or abbreviation to each allergen and dietary category, then display the relevant icons directly beneath each item name and description. Guests can scan the page visually and immediately see what applies to each dish.
Keep your icon set consistent and include a legend — either at the top of the menu or in a persistent sidebar/footer — so guests know what each symbol means. Don't assume everyone knows "GF" means gluten-free.
2. Expandable Detail Sections
For a cleaner visual layout, you can show only the most critical flags inline and let guests tap an item to expand a full allergen breakdown. This works especially well on mobile, where screen real estate is limited. The expanded view can include the full ingredient list, allergen warnings, and modification options.
3. Dedicated Allergen Filter
A more advanced option is to give guests the ability to filter the entire menu by dietary need — tap "Gluten-Free" and only GF items appear. This is particularly valuable for guests with multiple restrictions or for high-volume venues where guests want to move quickly. It also signals to guests that you take dietary needs seriously as a business.
Writing Allergen Descriptions Clearly
Icons help, but plain language still matters. Here are a few principles for writing allergen copy that actually communicates:
- Be specific, not vague. "Contains tree nuts (cashews, almonds)" is more useful than "contains nuts." A guest with a cashew allergy but not an almond allergy needs that level of detail.
- Distinguish "contains" from "may contain." "Contains peanuts" means the recipe includes peanuts. "May contain peanuts" means there's a cross-contact risk. These are different risk levels and should be communicated differently.
- Don't bury the warning. Allergen information should be visible before a guest has to scroll or tap. If it's hidden three levels deep, it's not serving its purpose.
- Keep it current. If your supplier changes an ingredient, your menu needs to reflect that immediately. One of the biggest advantages of a digital menu over print is that you can make that update in minutes, not weeks.
The Operational Side: Keeping Allergen Data Accurate
A digital menu is only as trustworthy as the process behind it. Here's how to build a reliable allergen workflow:
Maintain a Master Allergen Sheet
Keep a spreadsheet or document that lists every menu item, every ingredient in that item, and the allergens each ingredient contains. Update this document every time a recipe changes, a supplier changes, or a new item is added. This master sheet is your source of truth — the menu reflects it, not the other way around.
Assign Ownership
Someone on your team needs to own allergen accuracy. In a small operation that might be you; in a larger kitchen it might be your head chef or a designated manager. Without clear ownership, updates fall through the cracks.
Build Update Triggers Into Your Workflow
Establish a rule: any time a recipe is modified or a new ingredient is sourced, the allergen sheet and menu are updated before the dish goes live. This is especially important when rolling out seasonal menu changes — a new autumn special might introduce a tree nut component that wasn't on your menu before.
Train Your Staff
Even with perfect menu labeling, staff will still receive verbal questions. Train servers to know which items contain which allergens, to never guess, and to always verify with the kitchen when uncertain. The menu is a starting point — your team is the safety net.
Add a Disclaimer, But Don't Hide Behind It
A standard disclaimer — "Our kitchen handles allergens including peanuts, tree nuts, dairy, and gluten. Cross-contact is possible. Please inform your server of any allergies." — is reasonable and legally prudent. But it should supplement clear labeling, not replace it. A disclaimer buried in fine print at the bottom of a menu does not protect a guest who never sees it.
Design Tips for Allergen Visibility
Good allergen communication is a design problem as much as a content problem. A few practical tips:
- Use color consistently. If green means vegan across your menu, don't use green for anything else. Consistency builds fast recognition.
- Make icons large enough to read on mobile. A 12px icon is invisible on a phone screen. Aim for icons that are comfortably tappable — at least 24–32px.
- Don't clutter items with too many icons. If a dish has seven allergen flags, consider whether a text-based breakdown in an expandable section is cleaner than seven icons stacked next to the item name.
- Test on a real phone. What looks fine on a desktop preview can be illegible on a 5-inch screen. Always QA your menu on actual mobile devices before publishing.
- Contrast matters. Ensure your allergen labels have sufficient color contrast against the menu background, especially in dark mode. This also supports accessibility for guests with low vision — a point covered in depth in our guide on making your menu accessible to guests with visual impairments.
Legal Considerations and Best Practices
Restaurant allergen law in the U.S. is not as prescriptive as in the UK or EU, where Natasha's Law requires full ingredient labeling on pre-packed foods. However, the legal landscape is shifting, and several states have enacted or are considering stricter disclosure requirements. Beyond compliance, there's tort liability: if a guest has a reaction to an undisclosed allergen, the absence of clear disclosure is a significant liability factor.
Best practices to protect your business:
- Document your allergen information and keep version history so you can demonstrate what was published and when.
- Consult a food safety attorney or your local health department if you're unsure about applicable regulations in your jurisdiction.
- Consider a food safety certification (like ServSafe Allergens) for key staff members.
- Review your allergen labeling whenever you change suppliers, even for the same ingredient — formulations can differ between suppliers.
For a deeper look at the regulatory side of nutritional labeling, see our companion guide on how to present calorie and nutrition info on your restaurant menu legally and clearly.
Putting It Together: A Practical Checklist
Use this checklist when setting up or auditing allergen information on your QR menu:
- Compile your master allergen sheet — every item, every ingredient, every allergen flag.
- Define your icon/label system — choose icons or abbreviations for the Big 9 plus key dietary categories.
- Add a legend to your menu so guests know what each symbol means.
- Tag every item with the appropriate allergen and dietary labels.
- Add cross-contact notes where shared equipment or prep surfaces create a risk.
- Include modification options for items that can be adapted.
- Add a general disclaimer advising guests to inform staff of allergies.
- Test the menu on mobile to confirm icons are legible and labels are visible.
- Assign a team member to own ongoing allergen accuracy.
- Set a review cadence — at minimum, review allergen data every time the menu changes.
Frequently Asked Questions
Are restaurants legally required to list allergens on their menus in the United States?
Federal law (the FDA's Food Allergen Labeling and Consumer Protection Act) applies to packaged foods, not restaurant menus. However, several states have their own disclosure requirements, and the legal landscape is evolving. Regardless of what's strictly required in your state, clear allergen labeling is a strong liability protection and a genuine service to guests. Check with your local health department for jurisdiction-specific rules.
What's the difference between "contains" and "may contain" for allergens?
"Contains" means the allergen is a deliberate ingredient in the recipe. "May contain" (or "made in a facility that also processes") means the allergen isn't in the recipe but could be present due to cross-contact during preparation or manufacturing. Both are important disclosures, but they represent different risk levels — guests with severe allergies need to know the distinction.
How do I handle allergen updates when a supplier changes an ingredient?
The key is to build supplier changes into your allergen update workflow before the new ingredient enters your kitchen. When you receive a new product from a supplier, review the ingredient label and update your master allergen sheet and digital menu before using it in service. A digital menu makes this fast — a single update propagates to every guest who scans your QR code from that point forward.
Should I list allergens for every item, even simple ones?
Yes. Guests with allergies can't always tell from a dish name what's in it. A "house salad" might contain croutons (wheat), cheese (dairy), or a dressing with egg or soy. Listing allergens for every item — even ones that seem obvious — removes ambiguity and demonstrates that your labeling is thorough and trustworthy.
Can a QR code menu help reduce order errors related to dietary restrictions?
Absolutely. When guests can see allergen and dietary information directly on the menu before ordering, they make more informed choices and place more accurate orders. This reduces the back-and-forth between table and kitchen, lowers the risk of a dish being sent back, and — most importantly — reduces the chance of a guest receiving something they can't safely eat. For more on this topic, see our guide on using QR code menus to reduce order errors and improve accuracy.
Ready to build a digital menu that communicates allergen and dietary information clearly and keeps itself up to date? Create your QR code menu with MenuHoster — it takes under an hour to set up, and you can update your allergen labels any time without reprinting a thing. Your guests with dietary restrictions will notice the difference immediately.
MenuHoster Team
Helping restaurants go digital